How to E-file your Income Tax Return in these simple steps before 31 July 2018
To help you file ITR without any hassle, here is a step-wise guide about how to e-file ITR for the year 2018-19.

Filing an ITR is one of those tasks which was certainly not in your ‘job description’ when you started working. A near majority of the residents Indians lie in ITR – 1 bracket having an annual income of 50 lakh or less – which can be filed online completely without having to download any software. The source of income should be salary, property and interest among others.
With 31 July 2018 being the last date to file ITR- approaching nearer, we have got you covered. To help you file ITR without any hassle, here is a step-wise guide about how to e-file ITR for the year 2018-19.
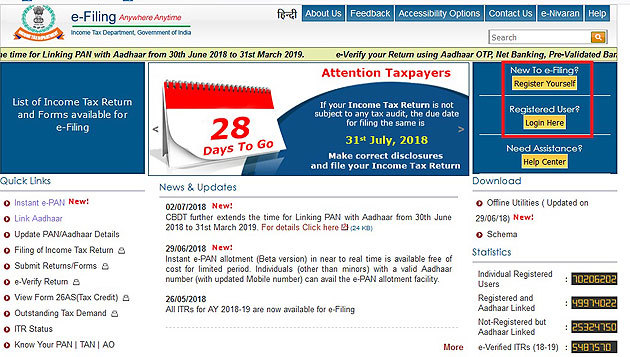
#1 Log on to the website.
#2 First time users need to register themselves by clicking on the ‘New Registration’ tab. Provide relevant details to generate a unique user ID and password.
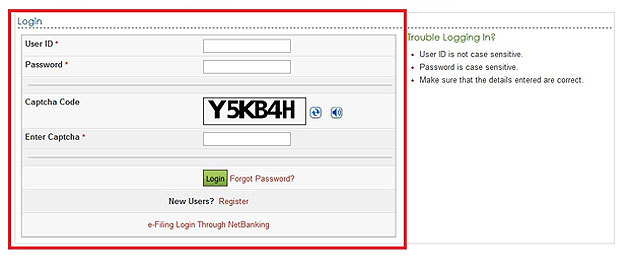
#3 Log in using your user ID i.e. your PAN, password and captcha code.
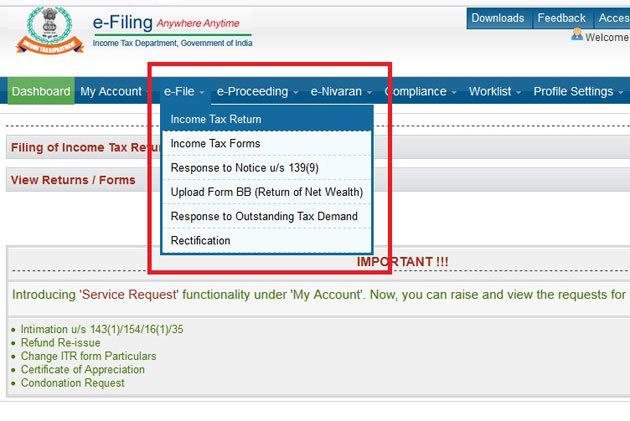
#4 Click on the ‘e-file’ tab and select ‘Income Tax Return’ option.
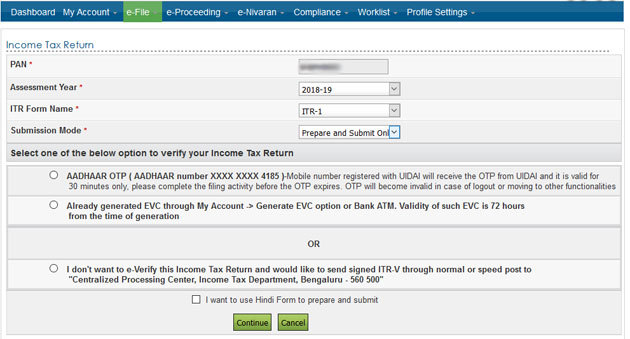
 #5 Select the assessment year, i.e., 2018-19, relevant form i.e. ITR-1 and submission mode – prepare and submit online.
Aside, you will also get 3 options to verify your returns:
a) Via Aadhaar OTP (valid for 30 minutes)
b) Generated EVC option through My Account or Bank ATM (Valid for 72 hours)
c) by sending signed copy of ITR-V to Centralised Processing Centre, Income Tax Department, Bengaluru -560500.
After selecting one of the option, click on submit. You also get an option to fill your ITR form in Hindi. Click on that button before clicking on continue.
#6 In the next step, the website will redirect you to the page for filling out the form as selected by you. Before starting to fill the ITR form, it is advisable to read the ‘General Instructions’ given at the start of the form to know the rules.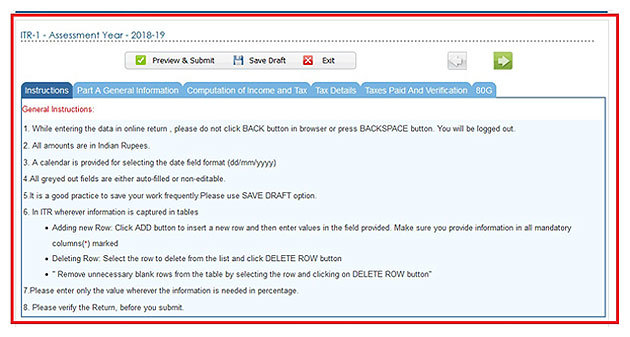 #7 In the next step, you are required to fill in the relevant information in different tabs i.e. ‘General information’, ‘Income details’, ‘Tax details’ ‘Taxes paid and verification’ and ’80G’ in the ITR form. Make sure that the Tax payable shown in the online form tallies your calculations.
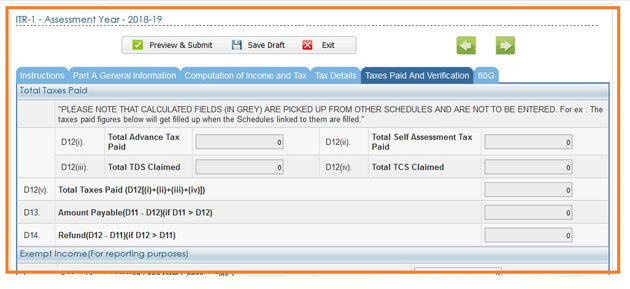
#8 Before proceeding for the final submission, make sure to save the data entered and recheck to avoid any bloopers. Once ‘Preview and Submit’ button is clicked, your form will appear allowing you a preview of your ITR form before final submission.
 #9 After you hit the submit button, your ITR will be uploaded. Now, you need to verify your return using any of the options available. You will get three options to e-verify your return.
1. I already have an EVC to e-verify my return.
2. I do not have an EVC and I would like to generate EVC to verify my return.
3. To verify your returns using Aadhaar OTP.
You can also use the offline method of sending a signed printout of the ITR V to CPC, Bengaluru within 120 days from the date of e-filing.
#10 You will get an acknowledgment/ ITR V simultaneously on your registered email once your return is successfully uploaded. This acknowledgment will also reflect in your account on the e-filing website. You can download it if required.
#11 Income Tax department processes the ITR once you verify it and intimates about the same via email and SMS on your registered mobile number.
Comments
- Advertisement -